Pages

Tuesday, July 30, 2019

lollipop shaker card

I'm over on the Trinity Stamps blog today with a sweet shaker! And it is so easy to make with minimal supplies.
Come on by!
Carly

Saturday, July 27, 2019

stretch your stamps

I'm over on the Neat & Tangled blog today stretching my stamps, turning some jump roping critters into a holiday card.
Come on by and check out my latest video!
Carly

Friday, July 26, 2019

sweet christmas card + ebe christmas in july hop

My personal cardmaking philosophy is that it is never too early to start making holiday cards and today I'm joining with some awesome crafters who agree! We are hopping today with a little Essentials by Ellen Christmas in July cardmaking hop!
If you are hopping with us, you should be arriving from the AMAZING Sandy Allnock's blog! And if you want to start the hop, head over to the Ellen Hutson blog.
My card today is all about sweets! I love candy and I had so much fun making little paper sweets to top an infinity shaker. 

You can see how it came together in this video...


Before you hop along (though I'm the last stop), we have a little prize! Tell me when & what you will be crafting for the holidays because one random & lucky commenter will win $25 to the EH shop! To enter for a chance to win, make sure to leave comments at each stop along the hop! Comment before Wednesday, July 31st at 11:59pm PST. Winners will be notified by email.

And one last thing, if you want to pick up this sweet Essentials by Ellen Ginger House stamp, it's on sale this weekend! Check out the other holiday goodies on special HERE!

Have a great day and thanks so much for stopping by!
Carly


supplies:

Sunday, July 21, 2019

2 easy masking techniques for cardmakers + national ice cream day

Happy National Ice Cream Day! Today I'm celebrating with my ice cream friends Ben & Jerry, LOL! I'm also joining in little hop with some of my crafty friends and I've got two super easy masking techniques to share.
If you are hopping with us, you should be arriving from Ilina's wonderful blog (and if you would like to join us, you can start over on the EH blog).
Now when I say easy masking techniques, I mean so VERY easy! One is a quick way to make color blocked backgrounds like the Mint & Neapolitan ice cream inspired backgrounds I made. And the other is a little more like a masking cheat.

Here's quick video...


I love how these ice cream inspired cards came out! It was so fun to pair the Essentials By Ellen Little Lady & Little Gentleman with the sweet treats from the Catherine Pooler I Scream You Scream set!

Before you hop along to Jen's fantastic blog, we've got prizes! We are giving away $25 to the EH shop and $25 to the Catherine Pooler shop! To enter for a chance to win, make sure to leave comments at each stop along the hop! Two random & lucky commenters will win! Comment before Sunday, July 28th at 11:59pm PST. Winners will be notified by email.
Thanks so much for stopping by and hope you get to enjoy a little ice cream treat today!
Carly


supplies:

Saturday, July 20, 2019

infinity shaker card

I'm over on the Neat & Tangled blog today with a super glittery, galaxy infinity shaker card! It might be a little over the top but I love it!
Come on by and check out the video!

Hugs!
Carly

Friday, July 19, 2019

handmade sorry cards with the stamp market

I have a confession...I've never sent an "I'm sorry" card but I probably should have! And now I have a few handmade sorry cards on hand just in case.
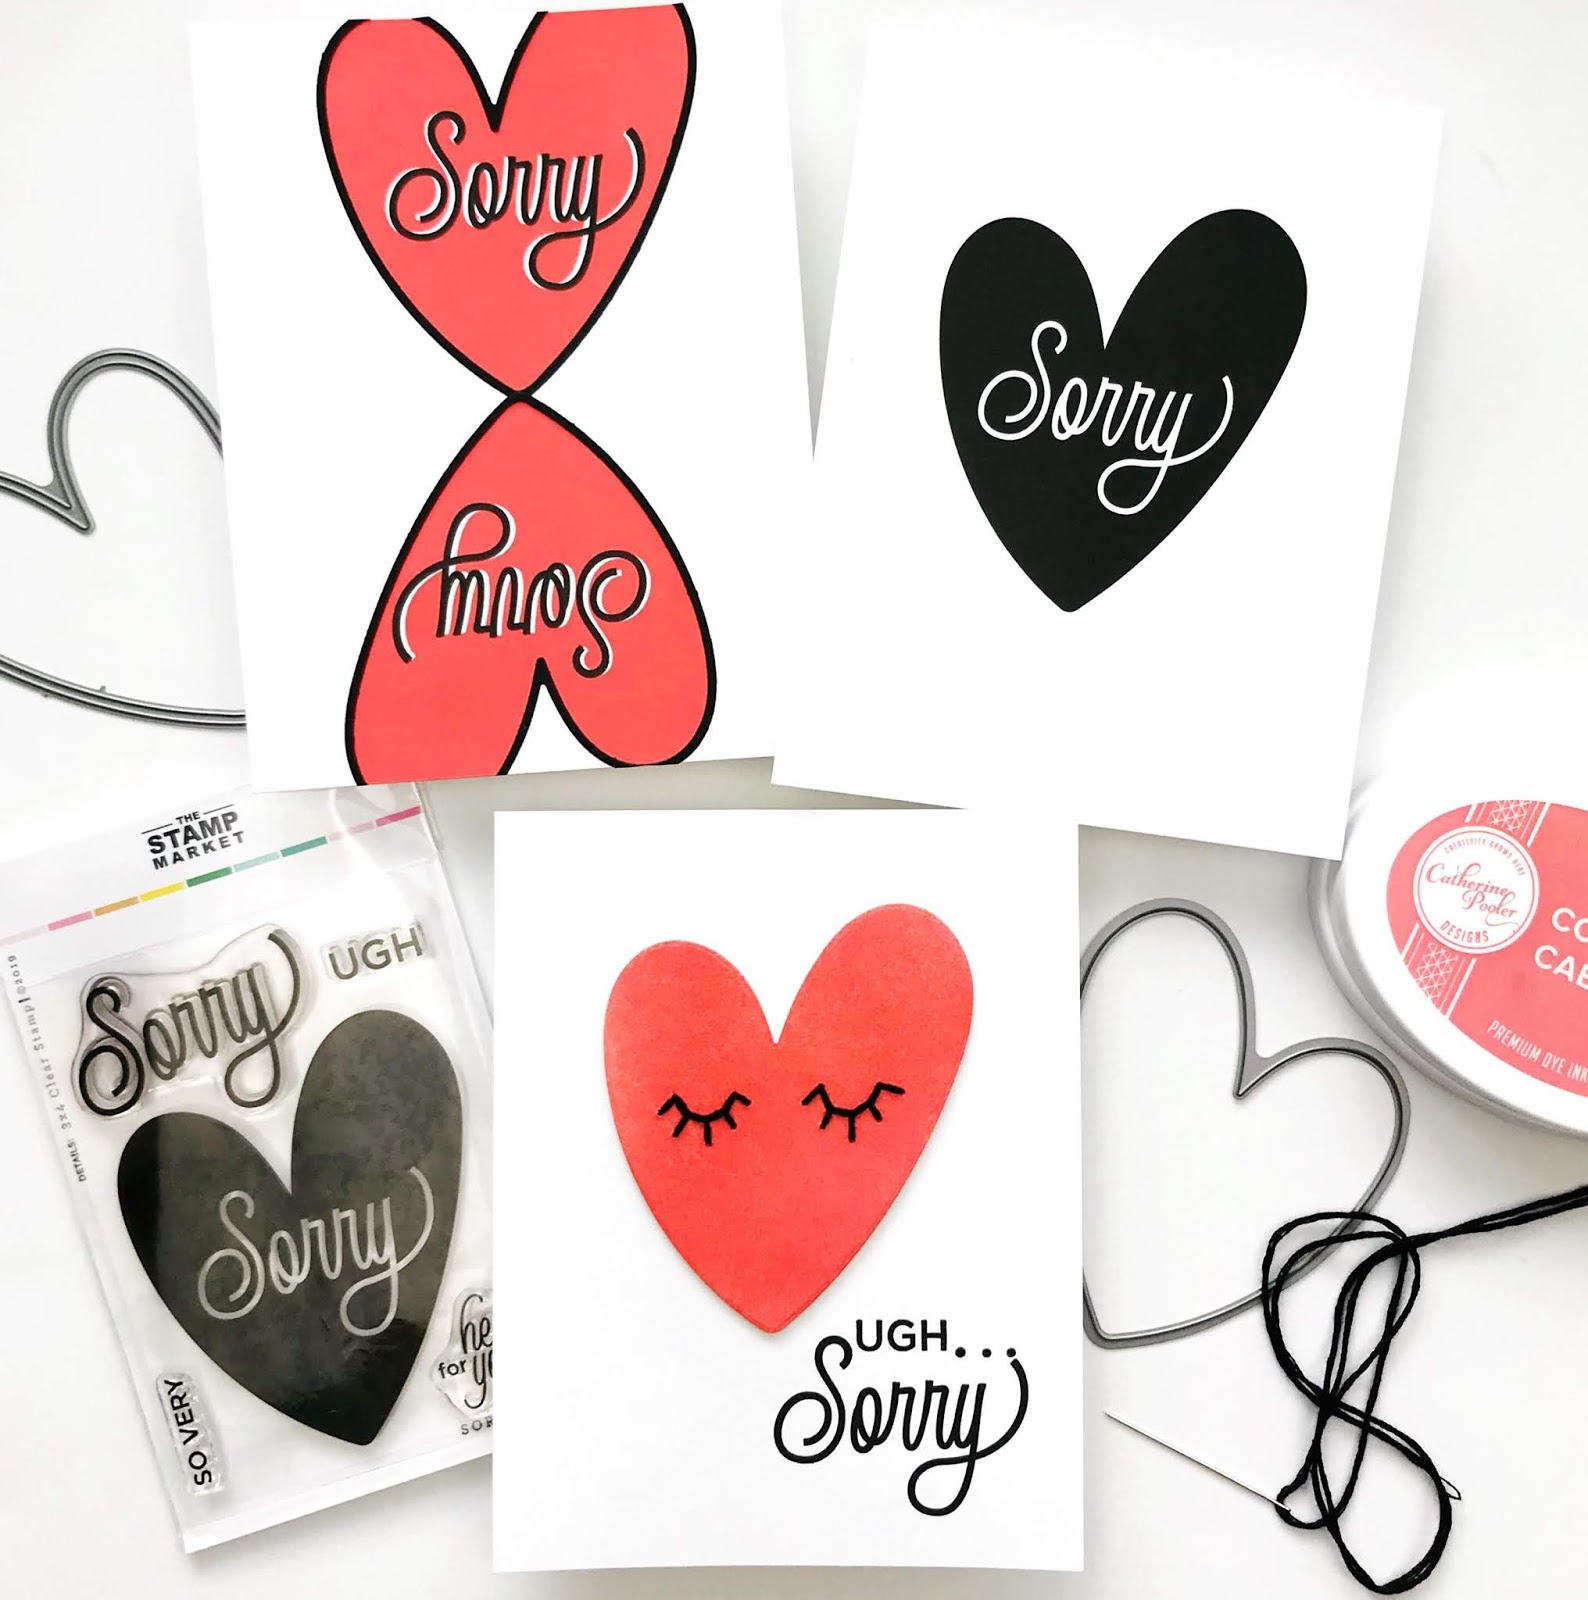
I was in a real "queen of hearts" mood when I made these black, white & coral-red cards!
This stamp is so sweet, I think it makes a perfect one-layer card just stamped in black.

I also like the playing-card look of stamping the hearts bottom to bottom. To add a little dimension, I added the die cut heart outline in black and stamped the individual "sorry" slightly offset on top of the coral stamped heart.

And finally I did a little free-hand stitching to add eye lashes to a die cut heart.

Thanks for stopping by!
Carly

supplies:


Thursday, July 18, 2019

diy shaker pieces

I am hopelessly addicted to creating shaker cards and I'm always looking for fun pieces to add to them. 

Recently I've started using my small stamp images to create DIY shaker pieces and I've got a quick video tutorial for you today on how I put them together...


my tips for creating shaker pieces...
  • this is a great way to use your small stamps!
  • use stacked layers to keep shaker piece from turning over in shaker. I like to use 3 layers for my shaker bits with 2 layers of foam tape to create my shaker.
  • I forgot to mention in the video but I apply Glossy Accents to the shaker bits taped to an acrylic block so I can set it aside to dry and keep crafting!


Thanks so much for stopping by!
Carly

supplies:

Tuesday, July 16, 2019

a fun way to use your cardmaking scraps

Are you looking for a fun way to use up some cardmaking scraps? I always am and I can't be the only cardmaker with lots of scraps leftover on my desk, right?!
I often have extra backgrounds. Sometimes I smudge some ink or just don't like what I've made. Sometimes it ends up being the wrong color. And sometimes I just get crazy making more backgrounds than I need because the technique I'm using is so fun (like alcohol inks or marbling). 
That's what this background is. It's a leftover from an afternoon spent having lots of fun with alcohol inks and alcohol pearls. And I think a great way to use up extra backgrounds (or backgrounds with a few small flaws) is to use them in shaker cards!
Using them as backgrounds for smaller shaker windows hides any flaws and is also just fun! Scraps of patterned paper make awesome shaker backgrounds too!
For this card, I had some adorable new Hello Bluebird goodies just begging to be played with. The "wild about you" die is perfect for a shaker window.
To pull the card together, I colored my jungle critters to match my alcohol ink background.

By the way if you are wanting to try making some alcohol ink backgrounds, EH is having a fab sale on a lot of cool goodies including alcohol inks and Copic Markers!!! Head over to Ellen Hutson to shop!
Thanks so much for stopping by & have a great day!
Carly

supplies:

affiliate links may be used at no additional cost to you. thank you!
Copic Markers RV02, RV10, YG01, YG05, YG11, YG41, BG11, BG01, BG05, B00, BV000, BV00, BV02, C5, C6 & C9
Ranger Alcohol Inks Wild Plum, TurquoisePistachio 
Ranger Alcohol Pearls Villainous & Tranquil

Sunday, July 14, 2019

2 ways to use layered stamps with the stamp market's summer stems

Today I've got 2 ways to use layering stamps like The Stamp Market's Summer Stems!
I'm often intimidated by layering stamps...the need for precision freaks me out! And so I find other ways to use them like using just the base layer to create a shadow/silhouette...
For this card, I stamped the base layer of the Summer Stems in embossing ink, embossed with white powder and then ink blended Distress Oxide Hickory Smoke over the top.
So easy and I love how velvety the Oxide ink looks!

Now emboldened by my success with the first card, I decided to give the layering of the stamps a try...
And I have to admit, it was SUPER easy to line these babies up! The Stamp Market has made it a breeze to get the layered look! If you've been wanting to try layering stamps (or have not had success in the past), start with this fab set!

Thanks so much for stopping by!
Carly

supplies:


Saturday, July 13, 2019

rainbow sentiment strips

I'm over on the Neat & Tangled blog today with two of my favorites, sentiment strips and rainbow!
Come on by and say hey!
Carly


Friday, July 12, 2019

diy stencils with essentials by ellen & glimmer paste

I can't seem to remember to pick up a wave stencil but it's ok because now I've made a DIY wave stencil that is perfect for using with my beloved glimmer paste!
Before we talk stencils, I should mention that we are having a little hop today to share the latest Essentials by Ellen release (peek at the whole awesome release HERE)! If you are hopping with us, you should be arriving from my wonderful friend Mindy Baxter's blog!
Today's DIY stencil really solved two problems...
  1.  I can never remember to order a wave stencil but now I don't need to!
  2.  And this stencil is reusable but I won't feel too bad about staining it with dark ink or not quite getting all the glitter off. If it becomes too much of a mess, I can toss it in the bin and make a new one! 
Here's quick video about creating the stencil and using it to create these inked & glimmer paste backgrounds...


Your next hop stop is the sweet & talented Emily Midgett's blog. And EH is also giving away prizes!!! One random & lucky commenter will win $25 to the EH shop and one will win the whole July Essentials by Ellen release!!! To enter for a chance to win, make sure to leave comments at each stop along the hop! Comment before Thursday, July 18th at 11:59pm PST. Winners will be notified by email.

Thanks so much for stopping by and have a great day!
Carly


supplies:
affiliate links may be used at no additional cost to you. thank you!
Essentials by Ellen Leading Gentleman (for "hey girl..." sentiment)
Essentials by Ellen Beach Lady (for "bon voyage" sentiment)
Distress Oxide Tumbled Glass & Cracked Pistachio inks
Avery Elle New Moon ink (my fav Copic-friendly ink)
Copic Markers RV04, RV06, RV09, YG41, B0000, B000, B00, B12, B32, B24, C1, C3 & C4
Moonstone Glimmer Paste
Acetate
Bristol Cardstock
Palette Knife

distress oxide watercolor

I'm over on the Honey Bee blog today with a little Distress Oxide watercolor practice.
Come on over! Hugs!
Carly

Sunday, July 7, 2019

easy shaker card with the stamp market’s fiddle leaf

I LOVE to make shaker cards but I usually use just one die cut shape to create a shaker window. For this card I used multiple leaf shapes from The Stamp Market's Fiddle Leaf set to create my shaker!
By the way, before I share more about this card, we are having a little hop to introduce The Stamp Market's latest release! So welcome!!!

I have to admit that I don't know a single thing about plants but I love this little set and I've got a plant lady in my life who will get such a kick out this card (especially coming from me)!


Here's a quick video of how easy it is to put this card together...


Head over to Ashlea's amazing blog next (I'm headed there too because I can't wait to see what she made). And you can see the whole new release HERE.

Thanks so much for stopping by and have a great day!
Carly


supplies: