Pages

Tuesday, April 25, 2023

post-it note card with mft stamps

It's time to mix business & pleasure with the adorable work themed card kit from MFT Stamps, The Office! It's available now in the MFT shop!

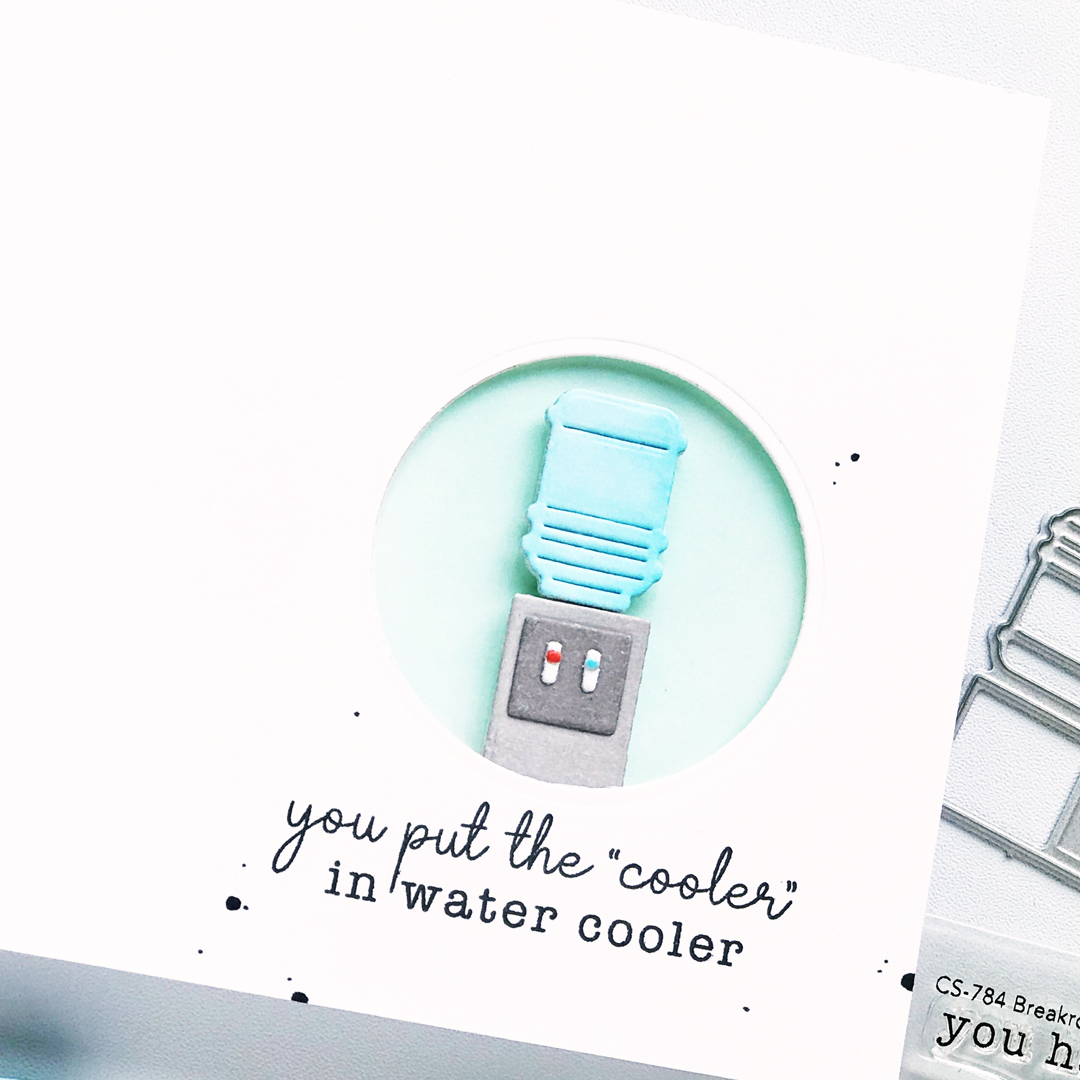
Before you run off to get yours, I want to show you a card I made using the Sticky Note die set and Sticky Note Sentiments stamp set.

I love post-it notes so it was so fun to add them to a card! I used the Sticky Note die and some lightweight yellow paper from my stash (which I will now be hunting for more of). I added a few layers stacked together to look like little notepad.

The sentiment is absolutely something I actually say so I love it!

The background is an easy stencil technique (and you can see it HERE on the MFT YT channel).

Thanks so much for stopping by! I hope you have time to pop over to the MFT blog to check out more cards made with the kit!

Hugs!
Carly

Monday, April 24, 2023

the office card kit

It has been a minute since I worked in an office but some of my best friends have started as coworkers and how fun to celebrate that with MFT's latest card kit, The Office! Want a little peek?

The kit includes a collection of the most adorable dies to create an office scene but for this first card I decided to go super clean & simple with just a water cooler!

I die cut the water cooler pieces from white cardstock and had fun coloring them all with Copic markers.

Pop over to the MFT blog to learn more about the The Office Card Kit and stay tuned for more ideas this week!

Thanks for stopping by!
Carly

how to make birthday shaker cards with essentials by ellen

I'm sharing a some sparkly birthday shaker cards in a quick video over on the Ellen Hutson blog today and I would LOVE it if you stopped by!

Hugs!
Carly

Wednesday, April 12, 2023

masking & ink blending with essentials by ellen

Need a quick card idea for spring? I'm sharing an easy but colorful design over on the Ellen Hutson blog today and I would love it if you stopped by!

Hugs!
Carly

Tuesday, April 11, 2023

easy brayered background with mft stamps

I love creating easy & colorful brayered backgrounds for my handmade cards and I think those backgrounds are the perfect canvas for special sentiments like the MFT Blessings and Twice Blessed!

For this card I used a soft rubber brayer to apply three colors of Distress Ink (Picked Raspberry, Kitsch Flamingo and Salvaged Patina) to a card panel.

Next I ran the panel through my die cut machine with "blessed" die and I saved the letter middles.

I added the stamped sentiment beneath the negative die cut word.

Then I adhered the panel to a folded white card and added the letter middles back in.

Make sure to pop over to the MFT blog to see more of the new release!

Thanks for stopping by!
Carly

P.S. Wanna see more about how I made this card? Pop over to my Instagram to check out the process in a reel!

Monday, April 10, 2023

mft april countdown day 1

It's almost time for the MFT Stamps April release and today I've got a silly shaker card to share...

When I saw the Movie Icons die set, I knew I wanted to make the pieces of popcorn into shaker bits! I die cut everything from white cardstock and colored them with Copic markers. The popcorn shaker bits are two layers adhered together.

And the sentiment from the Movie Night stamp set could not be more perfect!

Pop over to the MFT blog when you have a minute to see more of the April release.

Thanks for stopping by!
Carly

Sunday, April 9, 2023

mft april countdown day 2

Do you ever make a card that just doesn't quite work out? I have one of those to share with you today, LOL!

We are counting down to the MFT Stamps April release and I have been so excited to make something with Cherry Blossoms die set. I LOVE cherry blossoms!

I wanted to capture how pretty & fluffy the flowers are so I decided to layer cardstock and tissue paper. I'm not sure it really worked though. What do you think?

Catch more MFT Stamps April reveal on the MFT blog!

Have a great day!
Carly

Saturday, April 8, 2023

mft april countdown day 3

The countdown to the MFT Stamps April 2023 release continues today with flowers!


The new Flowers & Filler die set is full of beautiful blooms and the Flower Foundations set is full of containers for arrangements!

Instead of filling the watering can with flowers, I decided to let them pour out.

I die cut all of the pieces from white cardstock and used Distress Oxide inks to color (Lost Shadow, Salvaged Patina, Shaded Lilac, Saltwater Taffy & Dried Marigold).

The sweet sentiment stamp is from the Word Bouquet set.

Thanks for stopping by! You can find more peeks at the MFT April release on their blog!

Have a great day!
Carly

Friday, April 7, 2023

mft april countdown day 4

We're counting down the days until the next MFT Stamps release and today I'm excited to share a sweet & simple card with you!


I love die cut words and this new Twice Blessed set is on it's way to becoming one of my favorites!

For this card I created a simple watercolor wash background by swiping my Distress Oxide inks on my craft mat and picking up the color with a wet paintbrush.

After the panel was dry, I stamped the sentiment from the Blessings stamp set with Distress Oxide Shaded Lilac. 

Then I die cut the "blessed" three times (two white cardstock & one black) and adhered the layers together. And finally added the word above the stamped sentiment. I love the combo!

Pop over to the MFT blog when you have a minute to see more of the April release.

Thanks for stopping by!
Carly

Thursday, April 6, 2023

ink smooshing + mft april countdown day 5

Have you tried ink smooshing? Ink Smooshing is a really fun and easy technique using water-reactive inks, water and a surface to "smoosh" the inks onto cardstock to create backgrounds for handmade cards!

I love how ink smooshing can give a card a quick wash of color that you can add to or not.


Today, as we start counting down to the MFT Stamps April release, I've paired a quick ink smooshed background with the new Bunny Bouquet stamp set and a little Copic coloring.

To create the ink smooshed background, I swiped the Distress Ink Picked Raspberry on an acrylic block and misted with a little water. Then I used a piece of acetate to pick up the ink and smoosh it on to my stamped card.

After it was dry, I added a little simple Copic coloring.


Wanna see it in action? Pop over to my Instagram to check out the process in a reel! And don't forget to stop by the MFT blog to see more of the new stamps & dies!

Have a great day!
Carly

diy carrot piƱatas with essentials by ellen

Are you looking for a fun way to give some treats this spring? I'm making some mini carrot piƱatas!


Aren't they fun?! I am absolutely obsessed with making & giving little mini 
piƱata-type boxes and the Essentials by Ellen Pyramid Box is the perfect base!

Here's a quick process video showing how these little boxes came together...


Thanks for stopping by!
Carly

supplies:
affiliate links may be used at no additional cost to you. thank you!

Tuesday, April 4, 2023

how to create diy stencils

Did you catch my latest cardmaking video over on the MFT Stamps YT channel? It's all about stretching your cardmaking supplies and creating DIY stencils with die cuts!

I would love it if you stopped by to let me know what you think!

Hugs!
Carly