Pages

Tuesday, January 25, 2022

let's celebrate with mft

Can you ever have enough birthday cards on hand? I tend to think no but I also never really seem to have any, LOL! I'm thrilled about the MFT Stamps Celebrate Everything kit because I am going to stock my stash!!! 

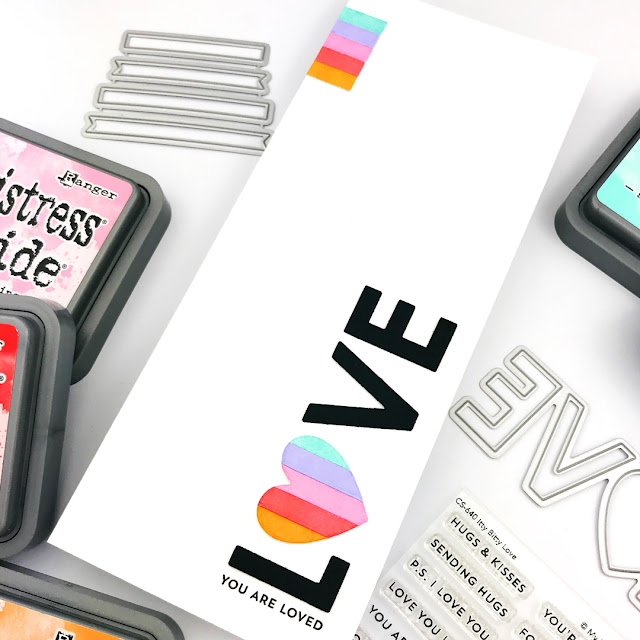
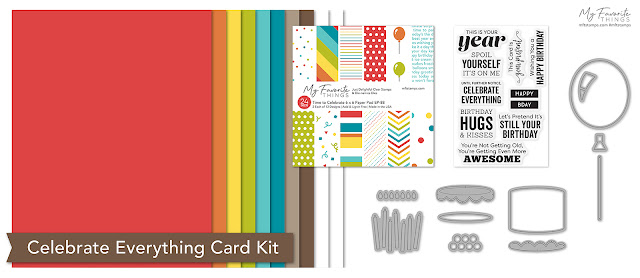
Check out how cute the kit is...
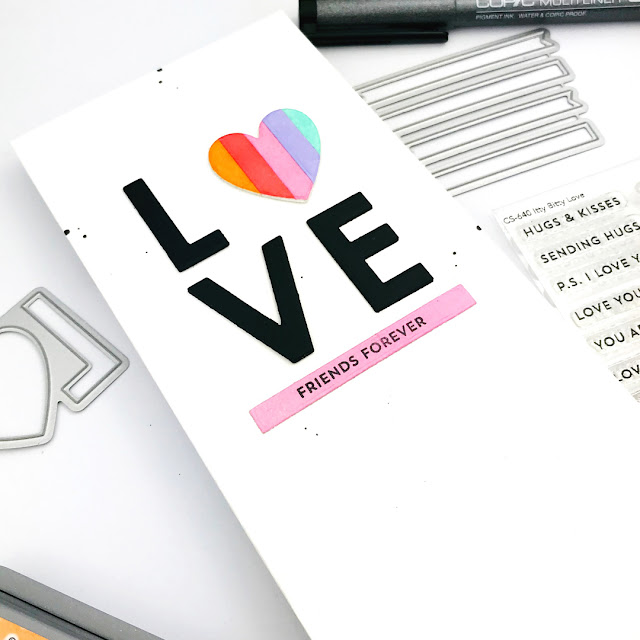
Here's the second card for my stash (you can see the first one HERE)...
I love how simple it was to put this card together! And I love how easily I can recreate it exactly the same or with small changes like a different color palette or sentiment.

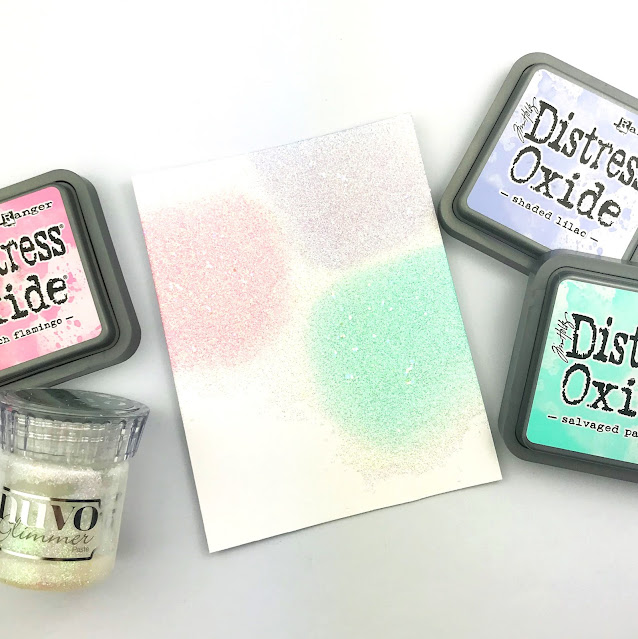
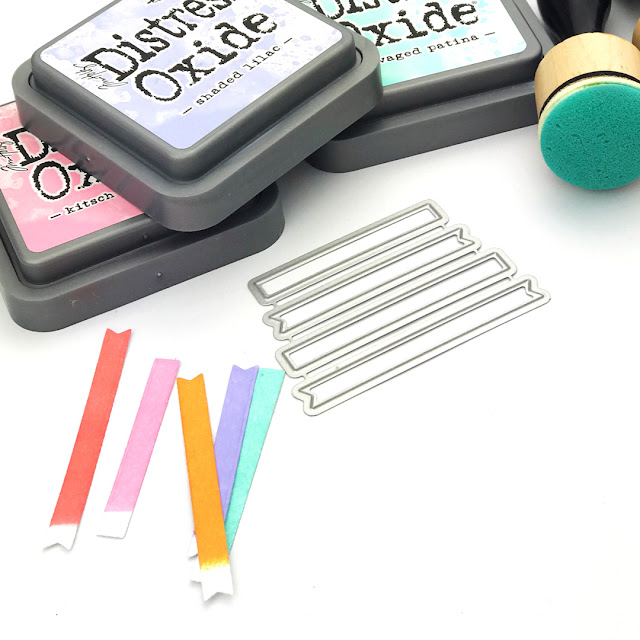
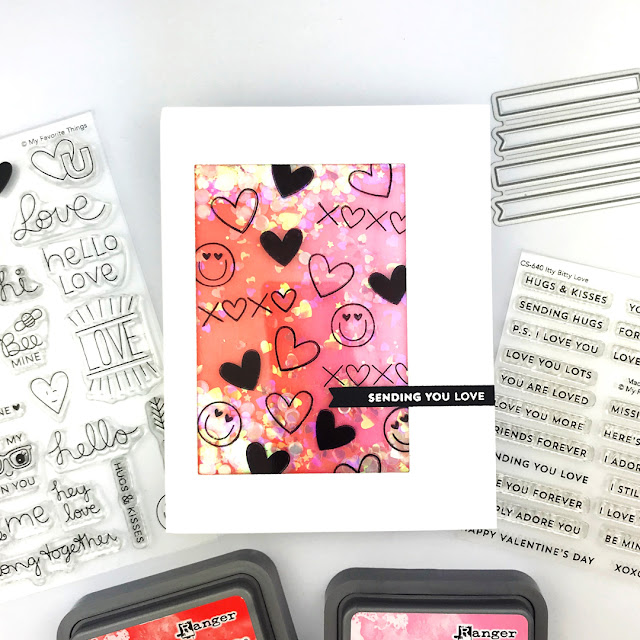
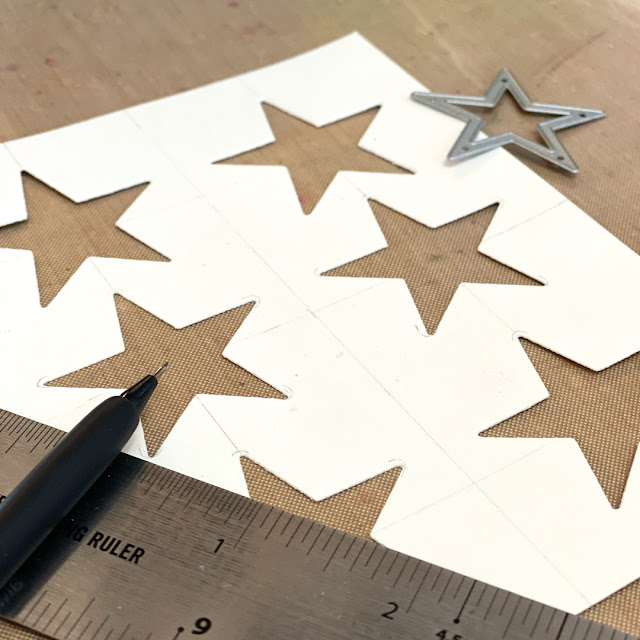
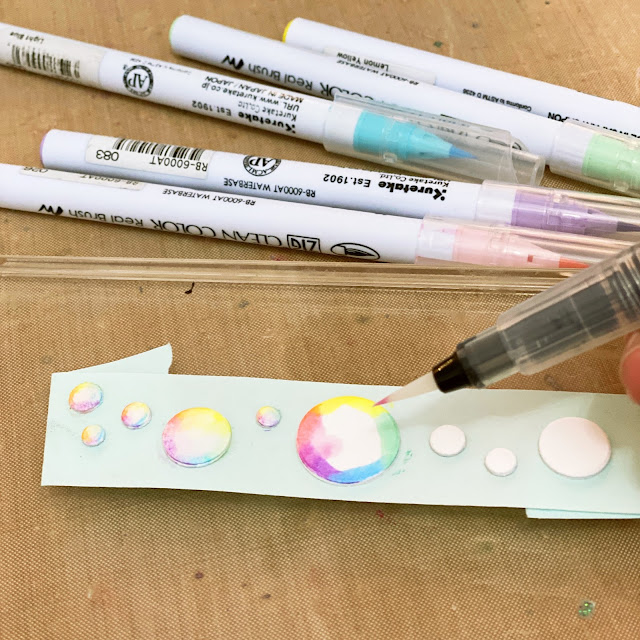
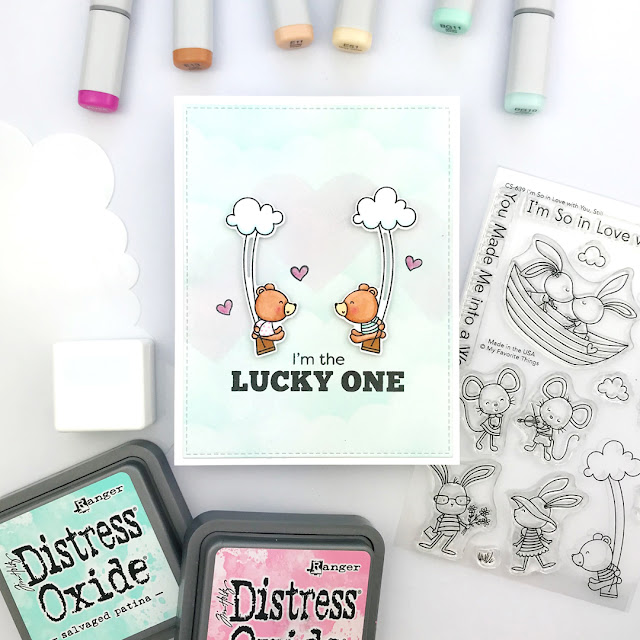
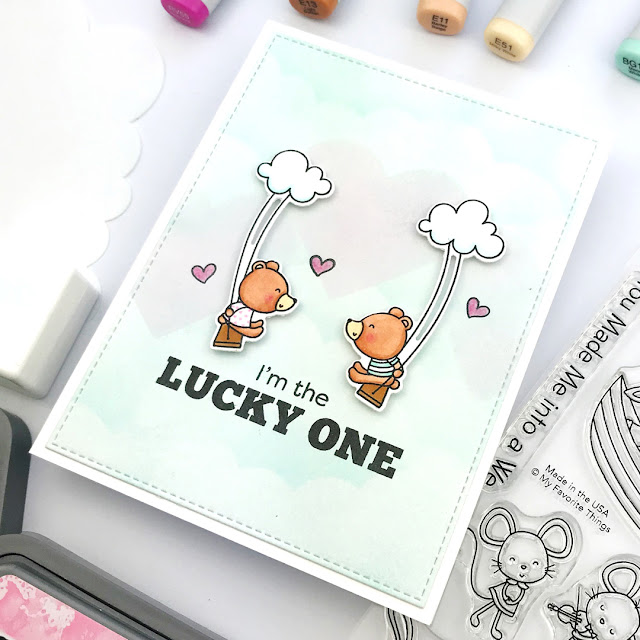
To create the card I started by coloring a few scraps of white cardstock with Copic markers. Then I die cut the scraps with the candle die.

Here are the colors I used:
  • R24
  • YR04
  • Y15
  • YG09
  • BG13
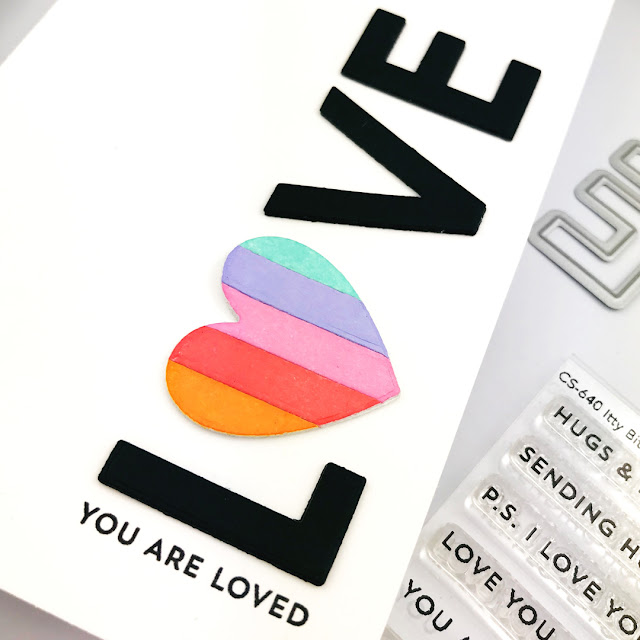
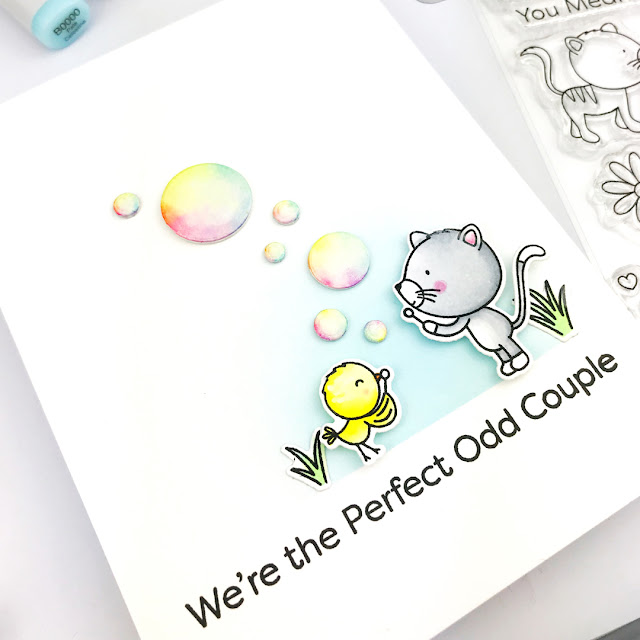
I used a dark gray marker to color the wicks and I topped them with flames die cut from yellow glitter paper. I used the Copic YR04 to add a little orange at the bottom of each flame.

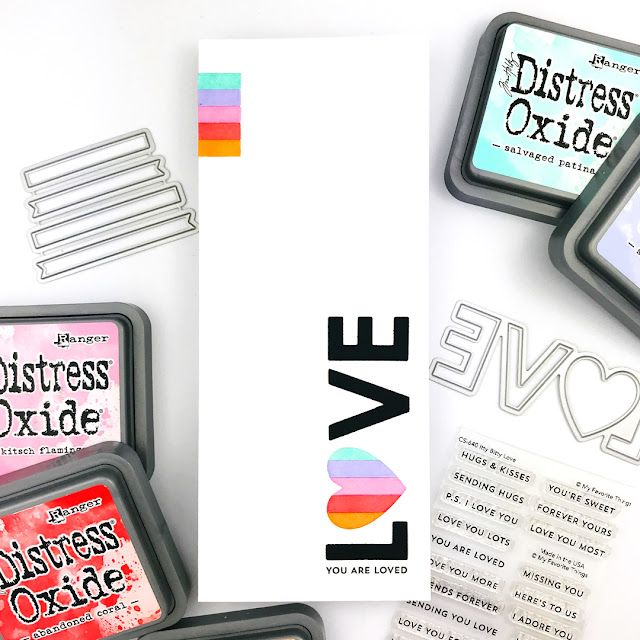
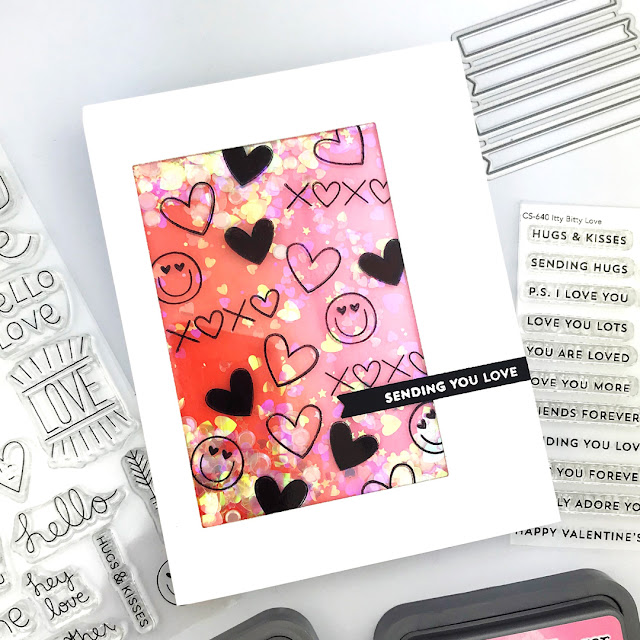
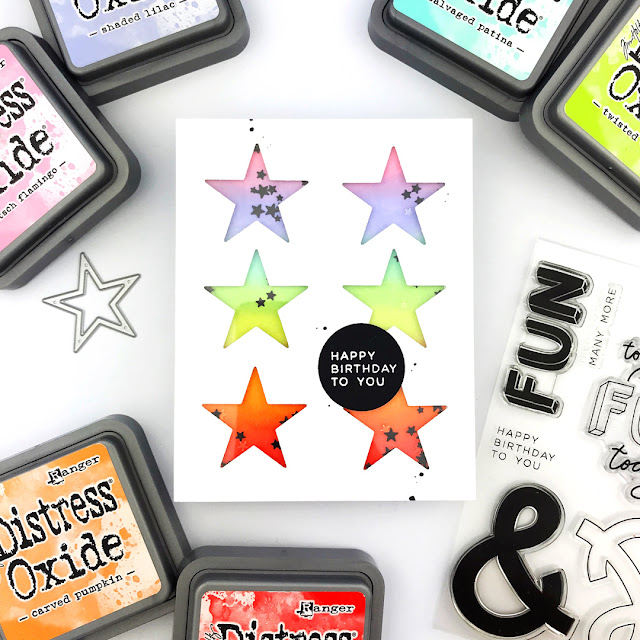
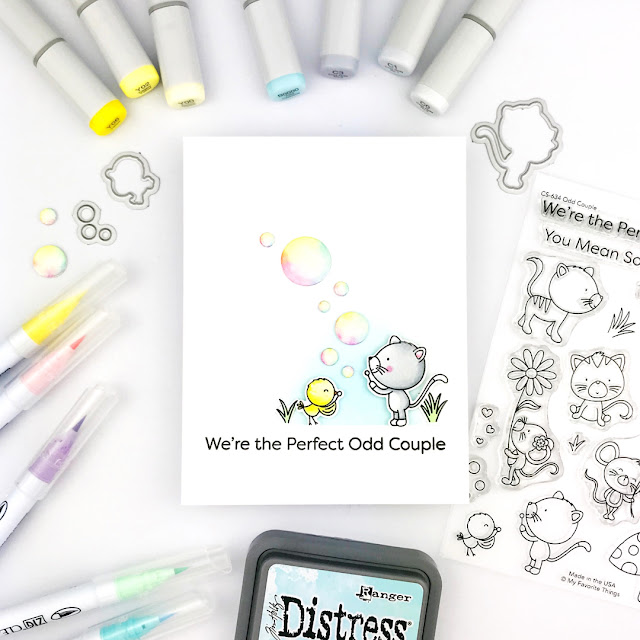
I adhered the candles to a folded card in a wonky line and stamped the sentiment beneath.
Thanks so much for stopping by! I highly recommend popping over to the MFT blog for more crafty inspiration!

Hugs!
Carly

Monday, January 24, 2022

celebrate everything with a new card kit from mft

Get ready to party! And when I say party, I mean order an adorable card kit and then make bunches of fab birthday cards!!!

MFT's latest card kit, Celebrate Everything, is dropping tomorrow! Here's a little sneak peek...

This card is two things I love, a sparkly shaker & cake! LOL!

The Celebrate with Cake die set is full of adorable pieces...the cake, the icing, the candles...and the cake shape is perfect for a shaker window! 

And the Celebrate Everything stamp set is perfect for this card and pretty much all other birthday cards I will be making from here on out!

So set your alarms for the release tomorrow and pop over to the MFT blog for more eye candy!

Hugs!

Carly

Saturday, January 22, 2022

conversation heart shaker card with essentials by ellen

Do you have a special someone who needs an extra sweet Valentine? Well I might be able to help! I just made a conversation heart shaker card and I love how it turned out!

What do you think? Is it sweet enough for your Valentine? If the answer is yes, here are the steps to make one...

Use a heart die to cut hearts from a heavyweight cardstock panel. I like to use 110lb Solar White cardstock to make sure the card panel is sturdy. And just a note, I cut 3 hearts but ended up wishing I'd cut 5 ;)

On another heavyweight cardstock panel, apply ink with blending brushes or foam. I used the die cut panel as a guide to make sure I was putting ink wear it needed to be for the hearts. And after ink blending, I added a little glimmer paste on top because why not?!

When the glimmer paste was dry, I inserted the panel into a shaker pocket. I like using Avery Elle storage pockets but Tonic also makes shaker pockets. Then I added lots of shimmery sequins and sealed the pocket closed.

The die cut heart panel is adhered on top of the shaker pocket. And I think this card could be cute just like this with a big sentiment stamp in the white space BUT I love conversation hearts!

To add the message to the hearts, I used the Essentials by Ellen Letterboard dies. Before die cutting, I applied double-sided adhesive to white cardstock. This makes little letter stickers! I use white cardstock so I can customize them to be any color for any project and I save all the unused ones each time I die cut a sheet.

After adding the messages, I adhered the whole shaker-pocket-with-heart-panel to a folded card.

Thanks so much for stopping by!

Carly

supplies:

Thursday, January 20, 2022

mft's slimline challenge - love words

Do you make many slimline cards? Did you know that MFT has a monthly slimline challenge and you can enter for a chance to win $50 to the MFT shop?

How could I resist joining in the fun when I heard that this month's slimline challenge theme is "love words". I love words on cards!!! Here's the card I created...


I used the Heartfelt Love die, which is quickly becoming a favorite in my craftroom. I die cut it 3 times from black cardstock and layered the L,V & E together for a little dimension.

To give the heart a pop of color, I die cut the Itty Bitty Strips from white cardstock and then colored them with Distress Oxide inks (Carved Pumpkin, Abandoned Coral, Kitsch Flamingo, Shaded Lilac & Salvaged Patina). 
I adhered the strips on a piece of lightweight printer paper and then die cut the Heartfelt Love die again, centering the heart over the colored strips.
I adhered the colorful heart to two plain white ones for dimension and then adhered the whole "love" word to a white slimline card. 

I added a few more colorful strips in the top left.

I stamped the "you are loved" from the Itty Bitty Love stamp set and ta-da!
I had so much fun that I made another card with all the same "ingredients".
Wanna learn more about the MFT Slimline Challenge? I hope you do ;) Pop over to their blog!

Have a great day!
Carly

Wednesday, January 19, 2022

mft's sketch challenge 577

Last week I admitted that I'm getting pretty hooked on cardmaking challenges! They are such a fabulous way to jumpstart creativity so I'm excited to be playing along today with MFT's Sketch Challenge 577.

Here's this week's sketch...

And here's my take on it...

You're probably not surprised that I couldn't resist making a shaker card. Haha!

And my little guy was taking a fab nap when I made it so I made a little process video to share...

Here are the MFT products I used:


I hope you are inspired to join this week's MFT sketch challenge! You can find all the info HERE on their blog.

Thanks so much for stopping by!
Carly

Friday, January 14, 2022

rainbow star shaker card

Don't you love when you are just playing with crafty supplies on your desk and it actually turns into something you love? That's what happened with this card! Sometimes it pays not to put things away...haha!

So here's how it started...I had a scrap piece of paper that had been dry embossed with the Essentials by Ellen Tiny Stars Background hot foiling plate. I decided to color it with a little ink blending and some of my favorite Distress Oxide inks.

I decided to stick with the star motif and pulled out the Essentials by Ellen Essential Star dies to create a shaker window panel. Precision is not one of my skills as a cardmaker so I drew light pencil lines to help me position the die.


After I was done die cutting the shaker window panel, I adhered acetate to the back.

Then I added foam tape to create a shaker "container" and filled it with my favorite tiny star sequins.


The sentiment is stamped & embossed with white powder on black cardstock and then die cut into a circle.


I love how bright & happy this card turned out! And I love that this design is one I can make again with a different sentiment for a different occasion.

Thanks so much for stopping by!

Carly

supplies:

Thursday, January 13, 2022

mft's color challenge 181

How do you find your creative mojo when it goes missing?

I just joined the MFT design team and decided to play along with their sketch challenge yesterday (see more on that here). It was so much fun that I decided to play along with today's color challenge...and I think I'm hooked on challenges!


I've never really tried doing challenges before but one thing I have always done to jumpstart my creativity is to limit my supplies in some way. Doing the MFT challenges is even better because they have already given you the guidelines!

Here is the palette for this challenge...

These colors are just perfect for Valentine's Day and this is what I made...

For this card I created a DIY stencil by die cutting the MFT Heartfelt Love die from a scrap of cardstock.

I used the stencil with MFT's pink & cherry inks to create an ombre love background. 

And while I have a tendency to just eyeball things, I wanted this pattern to be as clean & symmetrical as possible so I started by measuring & drawing a line across the middle. Then I made a line 1/8" above that and used that as the place to start my stenciling. I separated each line of loves by putting 1/8" between the top of the previous love & the bottom of the next one. Am I making any sense? LOL! Next time I'll just make a video.

After stamping, coloring & die cutting the kitty (which I colored with T1, T2 & T4 gray Copics because they match MFT Gravel Gray), I made an extra little slit in his tail to fit in the embossed sentiment strip.

A few black hearts and some faux ink splatter with a marker and ta-da!

MFT Supplies Used:

Wanna learn more about MFT's color challenge? Pop over to their blog!

Thanks for stopping by!
Carly

Wednesday, January 12, 2022

mft's sketch challenge 576

Have you ever participated in a card sketch challenge? Did you know MFT has a weekly one and you might win $50 to the MFT shop for entering? I'm not entering to win (because I'm already a lucky duck to be on the team) but I decided to try playing along this week. And you know what? It was super fun and a great way to jumpstart my cardmaking mojo!

Here's this week's sketch...

And here's my take on it...

I switched out the circles from the sketch for hearts and made an infinity shaker.

To make the infinity shaker I placed an A2 panel of pink glitter paper in a plastic pocket. By the way, did you know you can ink blend glitter paper? I had pale pink glitter paper that I made "pop" by applying MFT Poppin' Pink.

I added sequins to the plastic pocket and adhered it shut.

I die cut the hearts from a cardstock panel (making sure to save that little bottom left corner), stamped the sentiment on the panel and added some faux splatter with a black pen. 

Next I adhered the die cut panel to the plastic pocket and adhered both to a card.

Here are the MFT products I used:

I hope you are inspired to join this week's MFT sketch challenge! You can find all the info HERE on their blog.

Hugs!

Carly

Tuesday, January 11, 2022

mft's january release is available now!

The wait is over, MFT's adorable January release is available now!!! Before you rush off to shop, I've got another card to share with you!


I love these sweet odd couple critters and I couldn't wait to create some rainbow bubbles! After coloring my little bird and kitty cat simply with Copic markers, I felt a little intimidated at the idea of using Copics to blend a rainbow. So...I got out some of my Clean Color Real Brush Markers instead.

To make the bubbles, I layered three die cut circles and applied the color around the top edges. Then I blended the colors with a clear sparkle Spectrum Noir pen. (I always like to but small bits like this on a loop of low-tack tape on an acrylic block so I don't lose pieces while working.)


I blended a little bit of Distress Oxide Tumbled Glass on the card front over the sentiment before foam mounting the critters and adhering the bubbles.


Here are the Copic colors I used:

  • Bird - Y06, Y02 & Y00 
  • Cat - C3, C1 & C0

And here are the Clean Color Real Brush colors:

  • Light Pink 026
  • Lemon Yellow 051
  • Green Shadow 049
  • Light Blue 036
  • Lilac 083

Thanks so much for stopping by! Hop over to the MFT blog for more inspiration!

Hugs!

Carly

Monday, January 10, 2022

only 1 more day until the mft january release

The wait is almost over for the MFT January release but I have one more peek for you!


This set is called So In Love With You, Still. Isn't that so sweet?! I love the critter couples!

For this card I went a little out of my white-background-comfort-zone and used Distress Oxide Salvaged Patina with the cloud stencil. I might have been a little timid with ink blending though because as you can see it looks so pale in the photo, LOL!

I added a few ink blended hearts before foam mounting my swinging bears.

Here's a quick recap of the MFT products I used...


To see more, make sure you pop over to the MFT blog!

Thanks so much for stopping by!

Hugs!
Carly