Pages

Thursday, March 3, 2022

a sparkly mermaid birthday card & the mft stamps march release countdown day 5

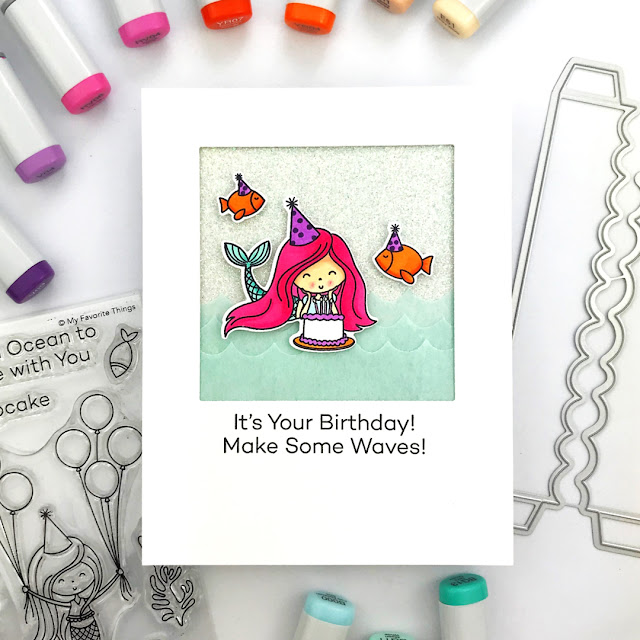
Is your favorite mermaid's birthday coming up? I've got the perfect sparkly mermaid birthday card for them using an adorable stamp & die set from MFT Stamps! 

And the countdown to the MFT March 2022 release starts now!

Isn't this mermaid the cutest?! She's from the MFT Bubbly Birthday set and she has two sisters in the set too!

To make this card I stamped and die cut the mermaid & little fishies before coloring them simply with Copic markers. Here are the colors I used...
  • mermaid - E11, E51, RV04, RV06, V09, V04, BG13, BG11 & B000
  • fish - YR07, YR04, V09 & V04

I die cut a square window from an A2 panel and mounted it to the card front with glitter paper & tissue paper waves beneath it. The waves are die cut with the Mini Slimline Outside the Box Waves.

Then the mermaid & fishies are foam mounted in the square.
Here's a quick recap of the MFT products I used...

To see more of the MFT March release, make sure you pop over to the MFT blog!

Thanks so much for stopping by! Hope to see you again tomorrow for another sneak peek!

Hugs!
Carly

Thursday, February 24, 2022

mft's color challenge 184

I'm afraid I'm turning into a broken record because I'm about to repeat myself AGAIN...the cardmaking challenges at MFT are making me feel so creative!

Today's color challenge was especially exciting for me! Let me tell you more...
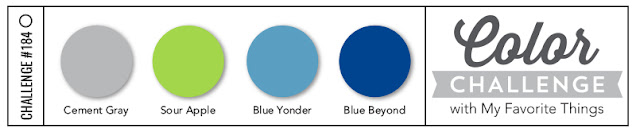
Here's the palette for the challenge...
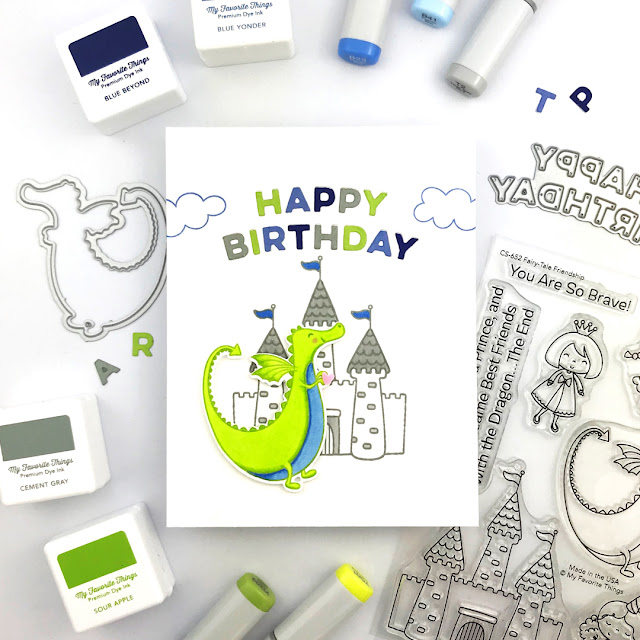
These are gorgeous colors but not colors I would normally use. I love pink and orange and rainbow, LOL! But I did it, I used this palette and honestly, I'm so smitten with how the card turned out!
I started by stamping the castle from the MFT Fairy Tale Friendship set in Cement Gray on an A2 white panel. 

Next I die cut the MFT Arched Happy Birthday above the castle. 

I stamped the clouds from the MFT Barnyard Birthday set in Blue Yonder.
I adhered the panel to a folded card and then inlaid the letters for "Happy Birthday". I used the ink cubes to color each letter because I'm silly and never have the right colored cardstock on hand. LOL!

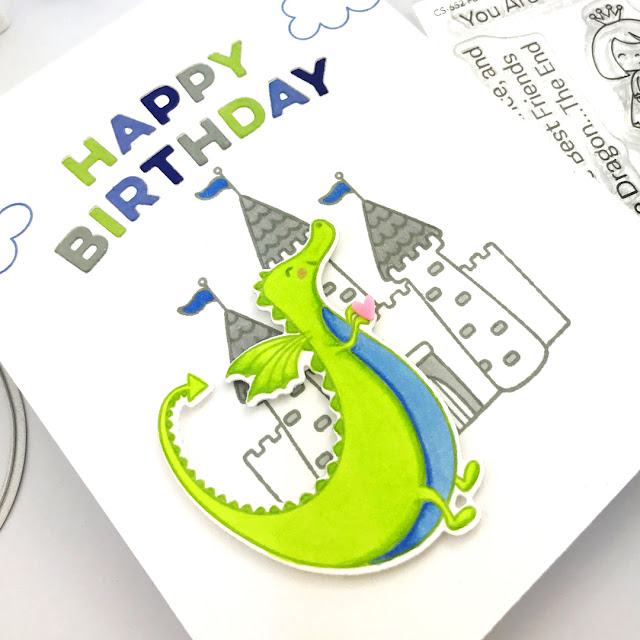
I did a teeny bit of coloring on the castle with Copic markers.

I stamped the dragon in Sour Apple, die cut him and colored him with Copic markers as well.

Here are the Copic markers I used:
  • Castle - T2
  • Castle Banners - B41
  • Dragon - YG03, YG01, B23 & B41
Finally I foam mounted him over the castle. And I couldn't resist adding a tiny bit of pink on his cheek & a clay heart sprinkle in his hands.

I hope you are inspired to join in this color challenge! Pop over to the MFT blog to learn more and thanks so much for stopping by!

Hugs!
Carly


Monday, February 21, 2022

mft's sketch challenge 581

I'm a little behind sharing my latest card for MFT's sketch challenge because last Monday I had a baby! Here's my sweet girl Mackenzie...

And even though I'm busy soaking up all the baby snuggles and the sketch challenge 581 is almost over, I wanted to share my card. Here's the sketch...


And here's my card...

I used the Mini Slimline Outside the Box Clouds dies as the background rectangles. They seemed like the perfect background for the floating kitten & balloons from the Purr-fect Pairs set.

There isn't much time left to enter this sketch challenge but remember that you might win $50 to spend in the MFT shop! Find more info HERE on the MFT blog.

And if this isn't the challenge for you, hopefully you will be inspired to try the next one!

Hugs!

Carly

Saturday, February 12, 2022

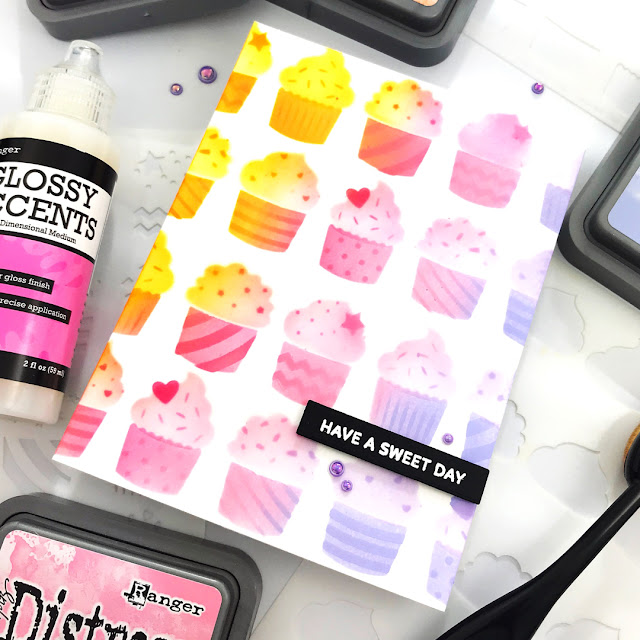
using glossy accents with pretty pink posh stencils

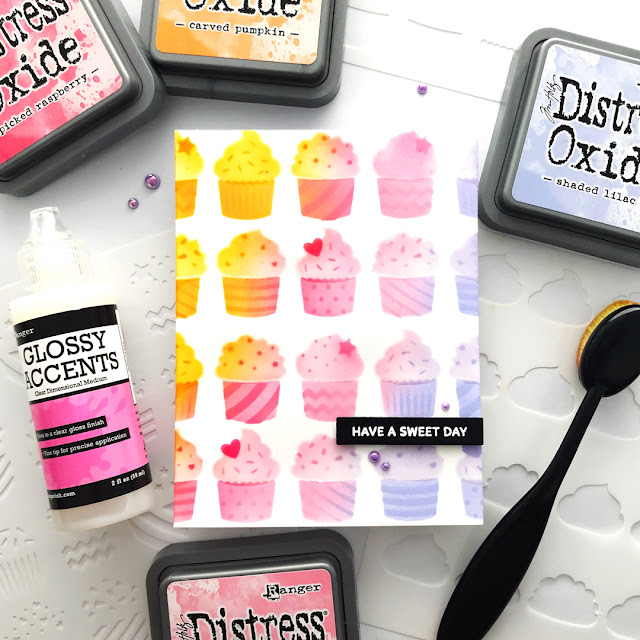
Do you use Glossy Accents when making handmade cards? I do, in fact it's one of my very favorite supplies and I love using it with stencils!

But before we talk more about Glossy Accents, let's talk about Pretty Pink Posh and their birthday release! I adore PPP's products and the amazing people behind the awesome brand!!! I'm thrilled that I get to help celebrate their 8th birthday today with a blog hop. And I'm delighted I get to share how fun their layering stencils are!!!

And one more thing before we talk cards, there are 3 $50 gift certificates to Pretty Pink Posh up for grabs! Enter to win by leaving comments along the hop by 11:59pm PST on February 16th, 2022. The winners will be announced on the PPP blog.

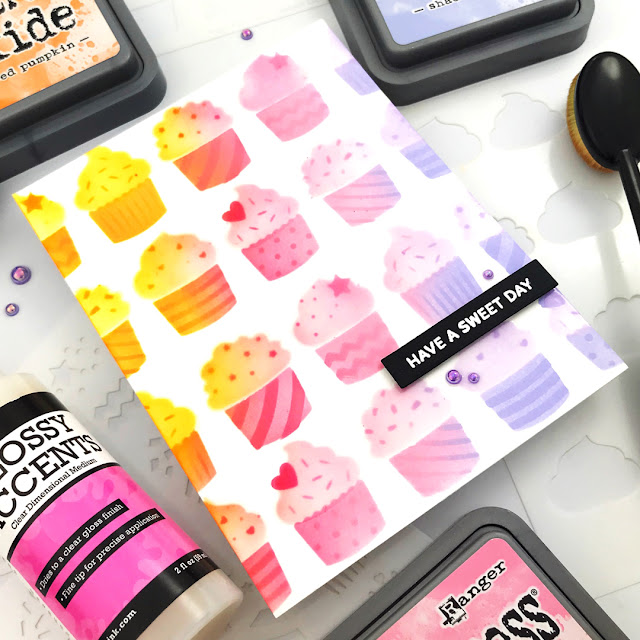
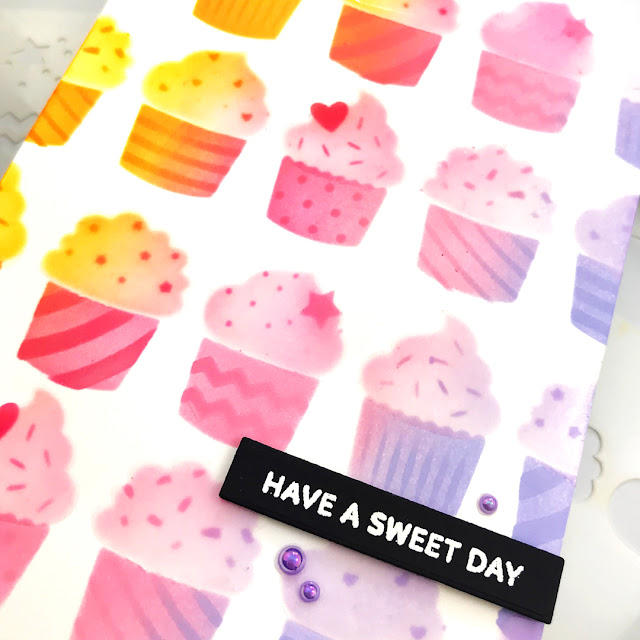
Ok, now let's talk about the super cute Layered Cupcake stencil and how you can use it with inks and Glossy Accents!

I created a quick video to show you the process...


Here are my tips for using Glossy Accents with stencils...

  • less is more...start with less Glossy Accents and make fewer passes with your squeegee/straight edge to help prevent "leaking" under the stencil. Add more Glossy Accents and more passes as needed. Spray adhesive for stencils like Pixie spray can also help with "leaking" but I'm rubbish with spray adhesive, LOL!
  • work quickly...clean your stencil & squeegee quickly to prevent the Glossy Accents from drying on your tools. I live in the rainy PNW so I might a little more time to clean my stencil but if you live in a drier climate, a container of soapy water is great to have nearby.

Your next stop on the hop is Channin Pelletier's amazing blog and I'm sure she is going to wow us!

Thanks so much for stopping by!

Carly

P.S. In case you get lost, here's the whole hop list...


P.P.S.

supplies:

Wednesday, February 9, 2022

mft's sketch challenge 580

It's time for another MFT sketch challenge! Are you ready for it?

I've been having the best time with these sketches! I'm feeling so creative thanks to these challenges! Since I'm on the MFT team, I'm not entering my sketch card to win BUT you can! Have fun creating, increase your crafty mojo AND enter for a chance to win $50 to the MFT shop...it's win-win-win!

Here's this week's sketch...

And here's the card I made...

I've been working on using up some of my crafty stash including some glitter paper in colors I didn't really like. This glitter paper started as a really pale peach that I was never going to use so I used blending brushes and MFT inks to create this ombre rainbow.

I used Lemon Drop, Orange Zest, Poppin' Pink & Summer Splash.

After the ink was dry I used the MFT Piece of My Heart die to cut a window. The great thing about using this die to create the window is that I can use the inside pieces on another card.

I adhered acetate on the back of the glitter paper to make a shaker window. 

Then I foam mounted the shaker window to a folded card with a pile of sequins in the middle.

The final touch was the sentiment strip using Itty Bitty Love stamps and Itty Bitty Strips dies. I used these stamps & dies so much! 5 stars, highly recommend!

Thanks so much for stopping by! I hope you are inspired to join this week's MFT sketch challenge! You can find all the info HERE on their blog.

Hugs!

Carly

Tuesday, February 8, 2022

mft's february release is available now!

I'm excited to share that the February release is available now!!! But wait...before you rush off to shop, I have another card to share with you!

I could not resist turning one of my new favorite dies into a shaker so I cut the Happy Cake Day die from the middle of a 110lb panel. 

I added a sentiment underneath and a few stars. And to make the shaker window I adhered acetate on the back of the panel.

To create the background I adhered yellow glitter paper to my folded card front. I added foam tape around the edge to create the shaker container and filled it with sequins.

Once the card was assembled, I added the "frosting" which created by coloring white cardstock with Distress Oxide Salvaged Patina and die cutting the Happy Cake Day again.

I used a glue pen to adhere the "frosting" to the top of the acetate shaker window. 

The final touch was some happy Barnyard Birthday buddies, watercolored simply with Distress Oxide inks Kitsch Flamingo, Shaded Lilac, Salvaged Patina and Squeezed Lemonade.

Head over to the MFT blog for more new release eye candy!

Thanks so much for stopping by!

Carly

Monday, February 7, 2022

just one more day until the mft february release

There's only one more day until the MFT February release and it's a party! I've got one more little peek for you...


To create the background I used Distress Oxide Salvaged Patina ink with the MFT Classic Edges stencil. Then I added a little bit of water splatter to create the soft texture.
The sweet little bouncing bear is colored with Copics and foam mounted to the card.

Lastly I stamped the sentiment and added a few star sequins. It's a super simple card but I really like how it turned out.
Here are the MFT products I used...
To see more of what's coming from MFT this February, pop over to the MFT blog and YT.

Hugs!
Carly